2024 Pedalboard Build For Praise and Worship
Sunday Tone 2024 Pedalboard Setup
Introduction
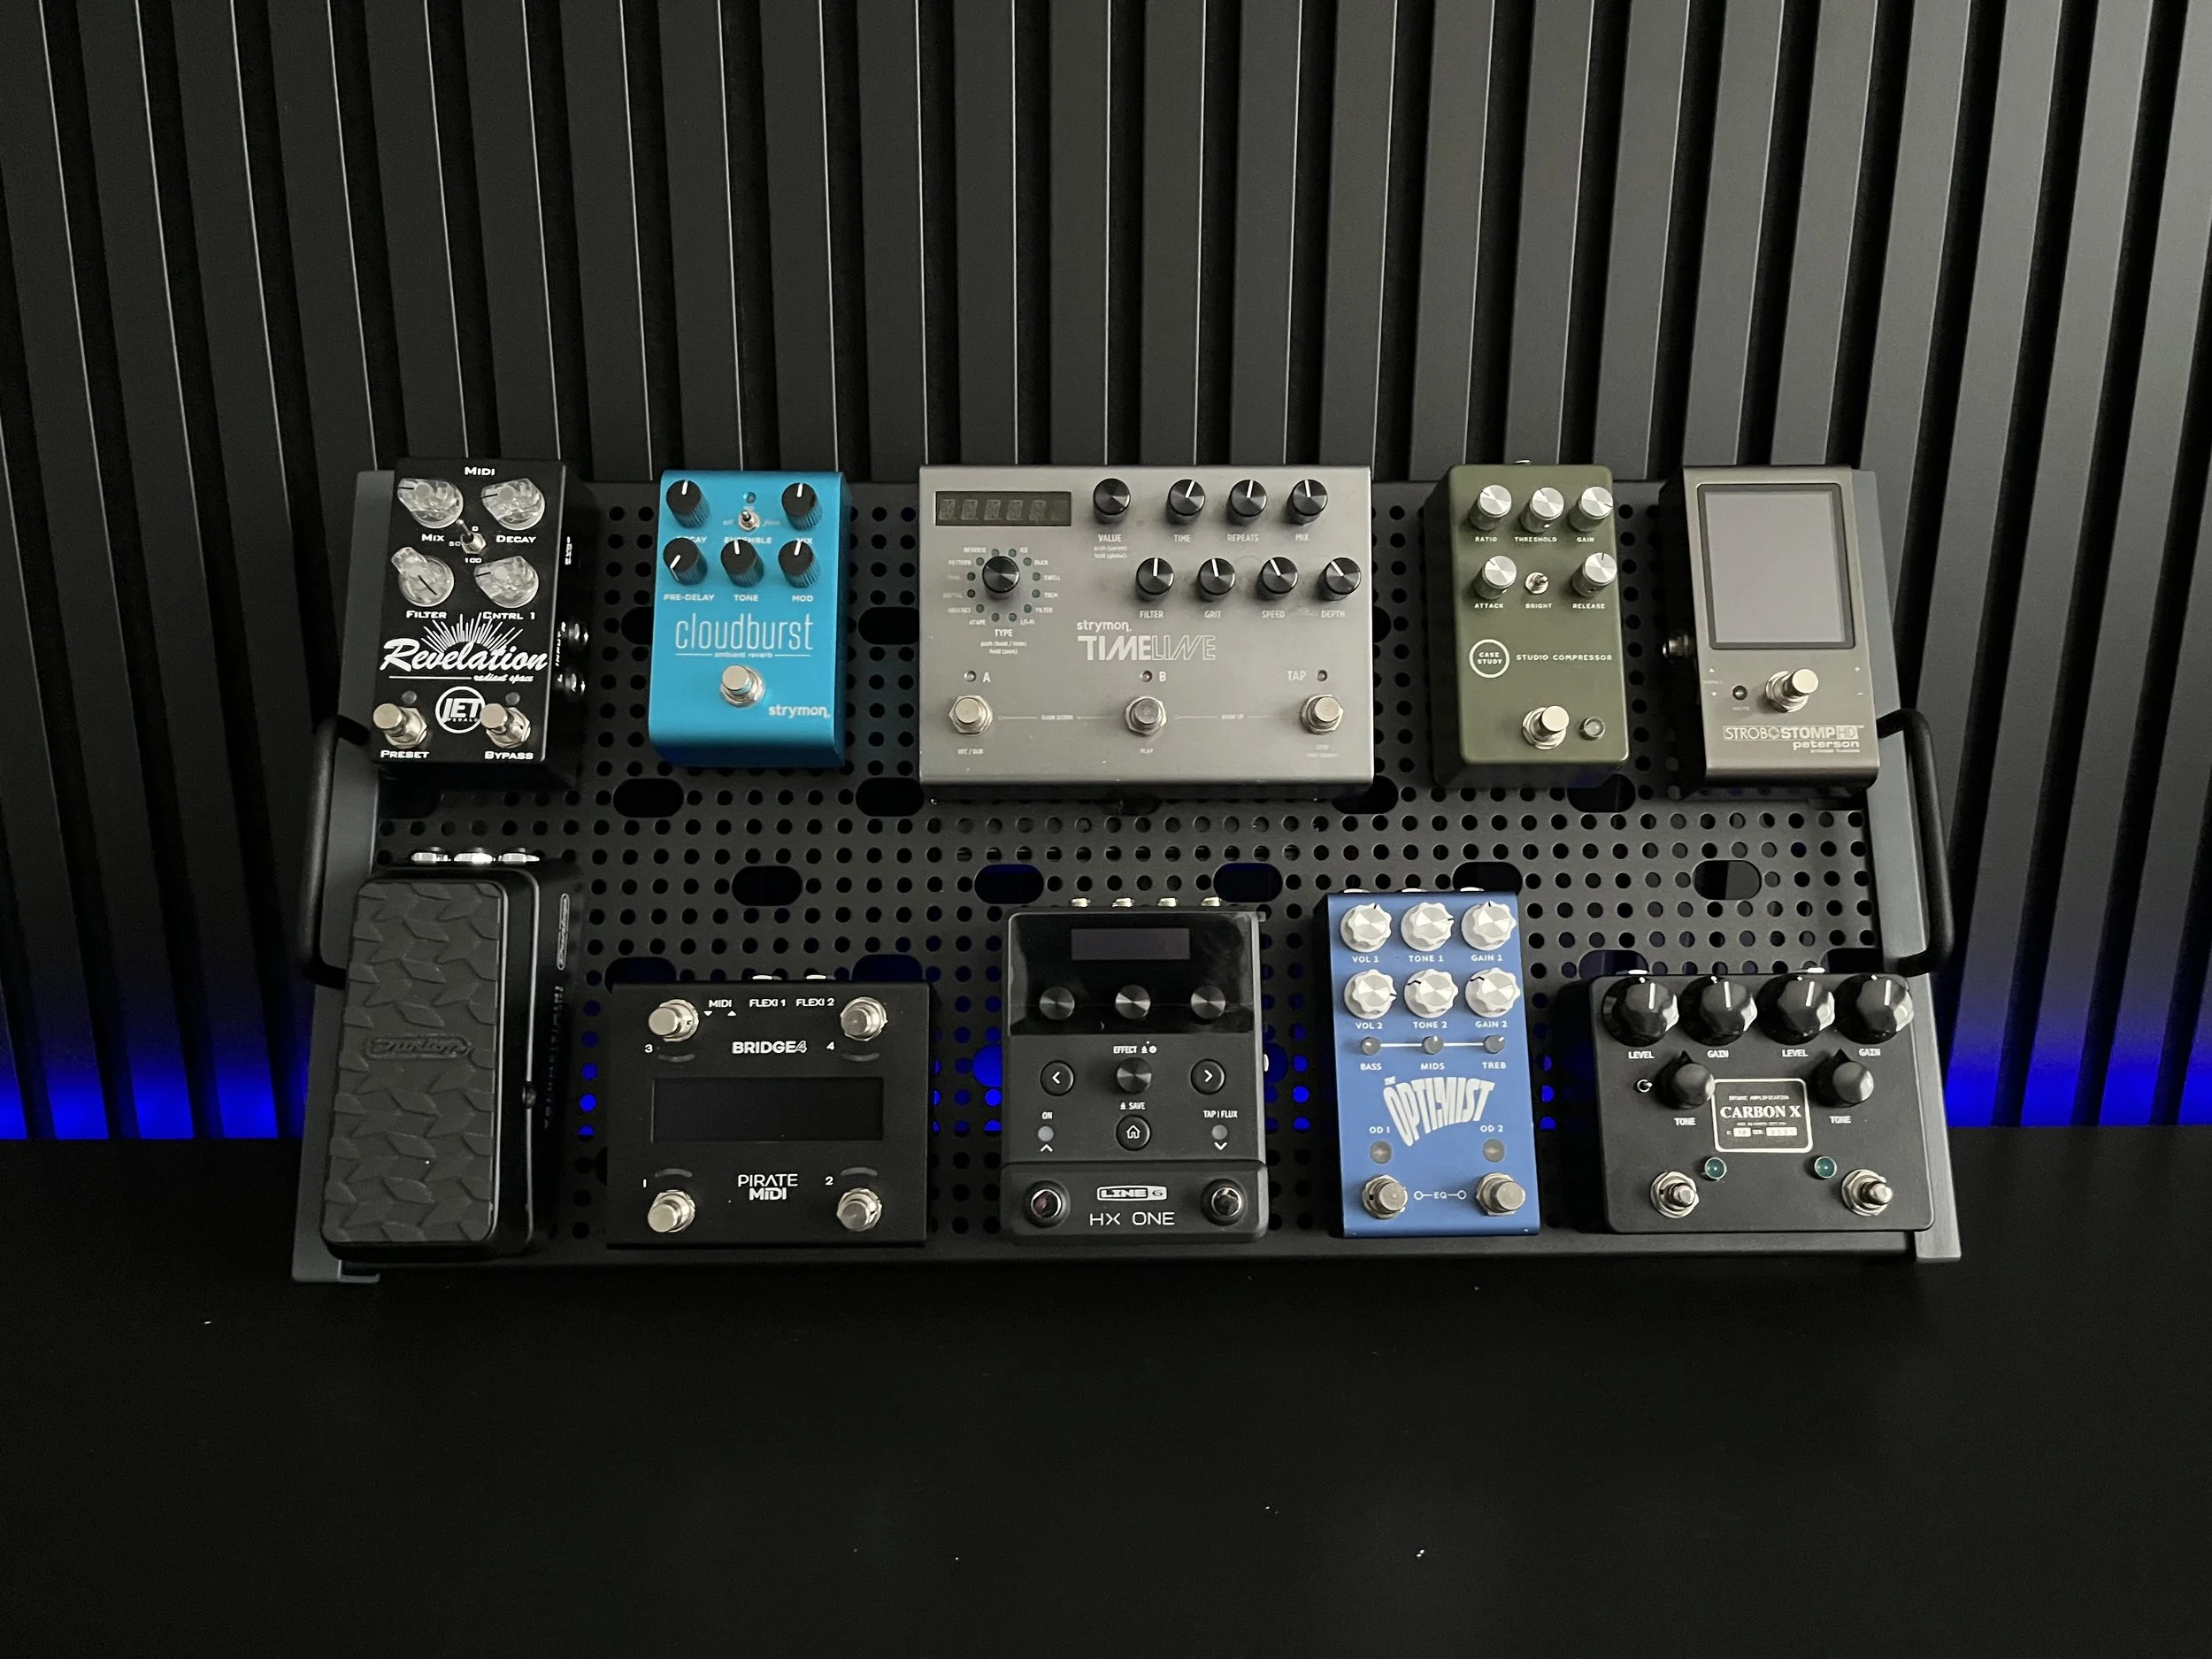
I spent much of the last few years using a pretty minimal (for me) pedalboard setup. At the beginning of 2024 I finally decided I wanted to design and build a larger pedalboard. So in the first half of 2024 I spent some time deciding on what pedals I wanted to include on this new setup. I also knew I wanted to incorporate midi into this setup to make it easier to switch presets on various digital pedals on my board.
Planning and Layout
I started the process of planning and building this board with a few constraints. I think having some sort of constraints, as far as size and power goes, is a good idea when planning out a new pedalboard build. At this point I had a list of essential pedals that I wanted to include on the board and from there I decided on a board.
Pedalboards come in a ton of different shapes, sizes, and materials. You can choose everything from a plank of wood at Home Depot all the way to a multi-tiered board with a road case. I have mostly had experience with different Pedaltrain boards in the past, so I knew I wanted to try something new. I knew I wanted something that didn’t just have rails like a Pedaltrain but had more space to mount pedals. I also knew I wanted to keep the price under or around $200 for the board. This led me to choosing a Temple Audio pedalboard, specifically the Temple Duo 24.
The Duo 24 gave me a good amount of space to fit the essential pedals I had with a little room to add a few extra pedals that I wasn’t able to fit on my previous board. The Temple boards also give you the option of adding their board modules where you can have inputs and outputs on the side of your board as well as various other accessories. The price of the Temple boards is also what drew me to them. They are cheaper then most boutique pedalboard brands but still give you some of those add-ons that come with pricier boards.
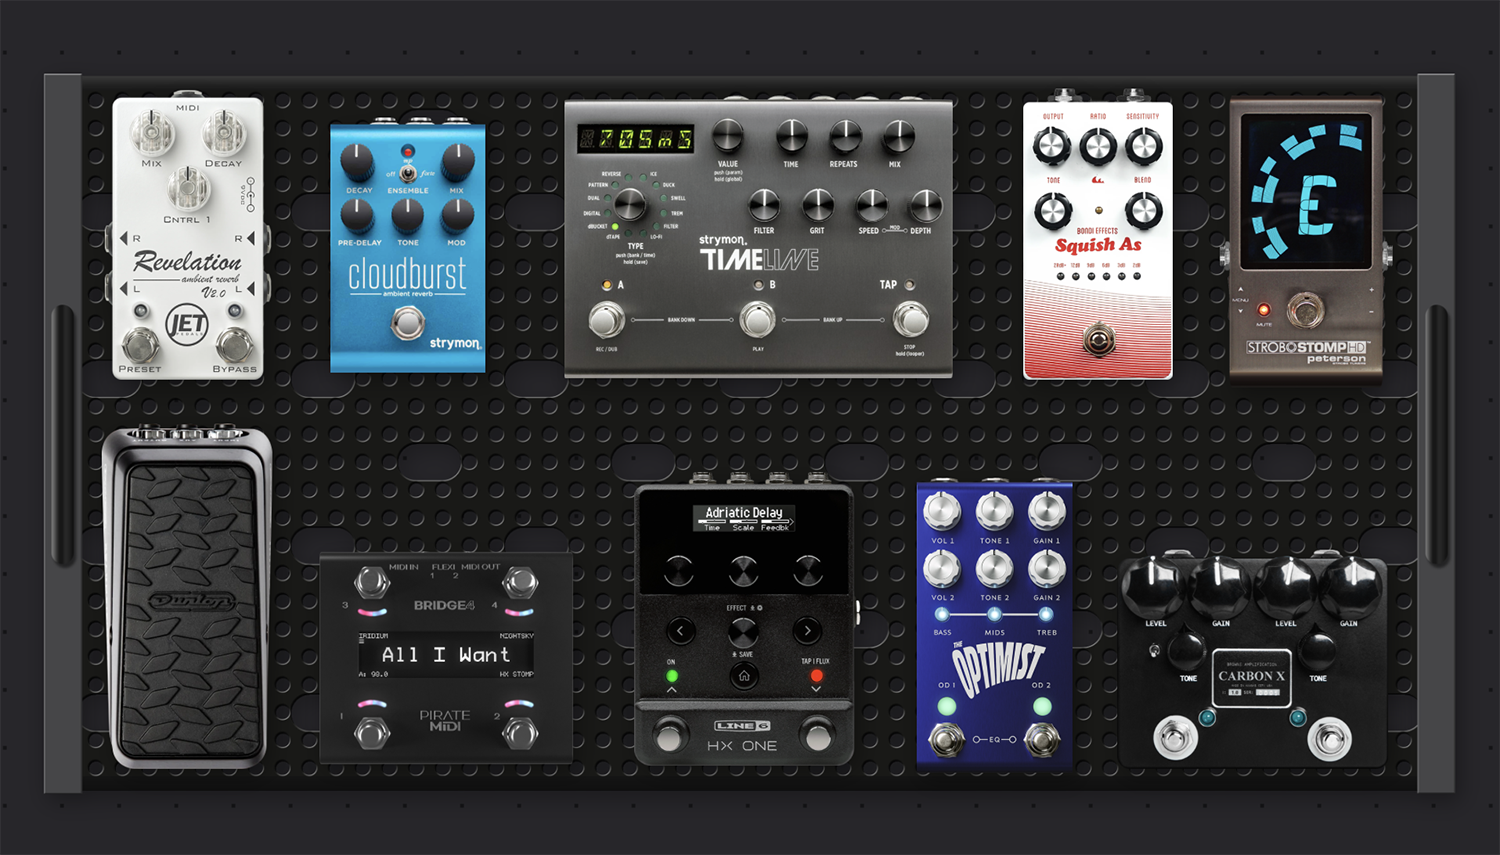
With the board and essential pedals chosen I went to Pedal Playground (https://pedalplayground.com) to start planning the layout. Pedal Playground is a great way to visualize your setup before you start so that you have a good idea of what can fit where. You can also use this to estimate what cables and other accessories you might need.
At this point I knew I wanted to incorporate midi into this setup but wasn’t sure which midi controller I wanted to go with. I had an open space on the board and used Pedal Playground to try out different controllers to find what would fit best. I found that the Pirate Midi Bridge 4 fit the empty space I had best and also had the features I was looking for. Below is the rough layout I came up with in Pedal Playground that I used as the basis for the build.
Cables and Accessories
After deciding on the pedals, board, and layout, I began figuring out what accessories I would need. This included midi cables, patch cables, temple modules, and power. I planned out the audio, power, and midi signal flow and used the following items for this build.
EBS TRS to Dual TS Y Cables (for Cloudburst)
Wiring Everything Up
Once I had all the accessories and final pedals decided on, I secured the power supply to the bottom of the board with dual lock and mounted the Temple Audio modules. Next, I used dual lock to secure all the pedals in place on the board. After that, test fit the audio cables to make sure everything would fit and then measured and created custom patch cables for all the audio runs. I used premade midi cables from Boss and One Control to do the midi routing just so I wouldn’t have to make those and I wanted cables that were low-profile. Finally, I wired all the power and made sure everything powered up and passed a signal.]
The Final Product
Below is a video where I show you the final setup with sound samples. I walk through the entire setup and all the components. So if you want to see and hear more - check out this video.
Lessons Learned
I tried some new things with this build. The first new thing for me is the Temple Audio pedalboard. Overall, I love the board. It’s lightweight, easily expandable, and doesn’t break the bank. I had heard a lot about these boards being flimsy but I haven’t experienced that and it has held up really well. Compared to the Pedaltrain boards, I really like the way that the Temple boards cover more of the underside of the board and have holes for passing cables under the board. This allows you to place pedals anywhere on the board and it hides some of the clutter under the board. It is worth noting that I didn’t use Temple’s plate mounting system. I just prefer to use dual lock. The one negative thing I found with these boards is that the holes for passing cables underneath are a bit small. I wasn’t able to fit the midi cables through the holes. This meant I had to route midi on top of the board.
I’ve been using this setup for the past few months and I really have enjoyed the expanded setup with midi. Although the overdrives and wet effects may get swapped in and out over time, I think I will stay with this layout for a while. If you have any questions about the board that I can answer, feel free to leave a comment on the video or reach out to me on Instagram.


